Sheet Composting - From Lame Lawn to Lush Garden
Sheet Composting is in essence a big flat compost pile. Also known as sheet mulching, with this method the materials are collected and layered in the place where they are bound to be used. If you think about it, this is the method that most closely mimics nature's way of cycling organic matter.
Sheet Composting Creates New Garden
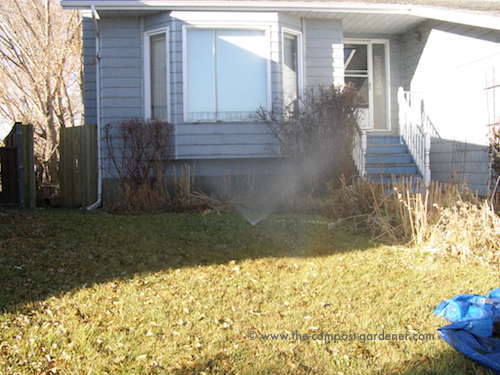
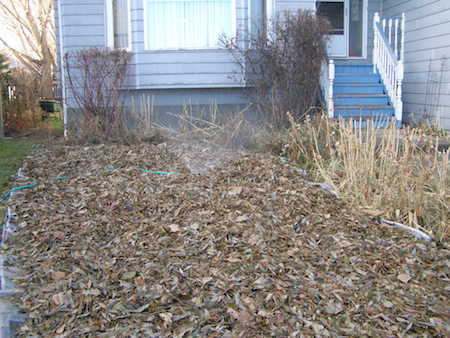
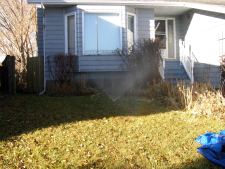 My Lawn Before
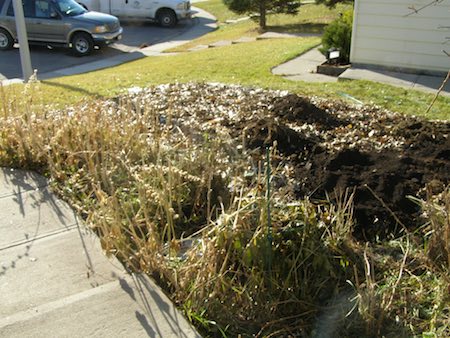
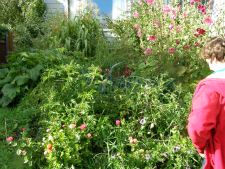 One Year Later
The Upsides of Sheet Compost
- You save the work of moving compost ingredients from garden to pile and, once rotted to compost, back to the garden.
- Because you don't disturb the compost, you don't disturb the soil organisms and the earthworms so you leave the ecosystem they build intact.
- The liquid that naturally flows from compost process ends up enriching the soil in your garden plot instead of ending up under your compost bin.
Where to Use Sheet Composting
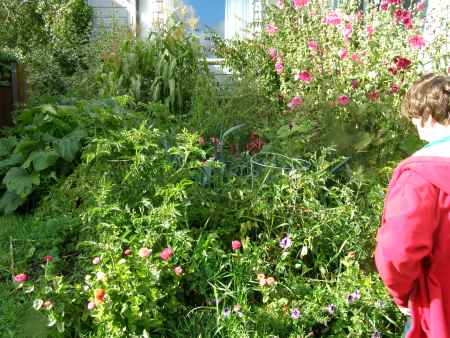
Sheet composting can be used in a number of ways. A few years ago I used this method to convert part of my lawn to a flower and veggie garden. It saved me the work of cutting and removing the sod and digging the garden. Pretty lush results as you can see from the pair of photos at the top of the page.
As you can see this method works for starting a garden where there once was a lawn. Sheet Composting is also a great way to
- Cope with fall garden clean up chores
- Renovate a weedy or poor garden bed
- Protect your garden soil and put the garden to bed for the winter
- Make excellent use of all those fall leaves
Step by Step Sheet Composting
I'm going to take you step by step through the sheet mulching process I used to convert my lawn to a garden.
Step 1 Mow then Water
Choose the area you are going to build up into a new or just refreshed garden bed. Mow down the existing plants as close as possible to the soil and then water the area thoroughly. Here is a photo of my lawn I converted to a garden. Just leave the plants on the ground, yes even if they are weeds.
If you have really compacted soil you may want to stick a garden fork in the soil and rock it back and forth. Do this all over but don't turn the soil. You just want to create channels without disturbing the soil life that is already there.
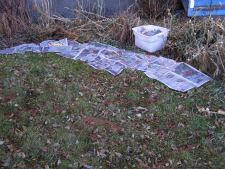
Step 2 Collect Newspaper or Cardboard
Collect enough newspaper to be able to put an overlapping 8 sheet thick layer of paper over the area you are sheet composting. You can also use cardboard for this step.
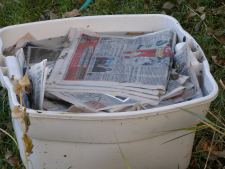
Soak the paper or cardboard thoroughly. Here you can see I have a bin of newspaper soaking for the project. You need at least 8 layers of newspaper and it needs to overlap so that you block out the sun and smother the grass or other vegetation you are trying to get rid of.
Step 3 Extra Rich Food
Choose some sort of extra food to jump start the
decomposers who are about to break down the materials you will soon be
piling on your paper base.
I used dried molassess. This is a
great food for bacteria in particular. I like it because it is cheap,
readily available at the UFA (United Farm Association) store near me,
and easy to use. Here is a photo of the dried molasses.
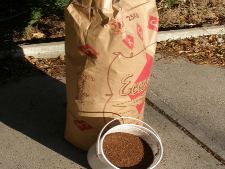
The
dried molasses causes a bacterial bloom that feeds on the
grass or whatever you are trying to decompose through your sheet
mulching.
Other things to use could be
- humic acid - a
substance considered akin to chocolate for fungi
- a light sprinkling of compost to beef up the decomposer populations directly on the grass or whatever needs to decompose
- a high nitrogen material like fresh grass clippings or manure
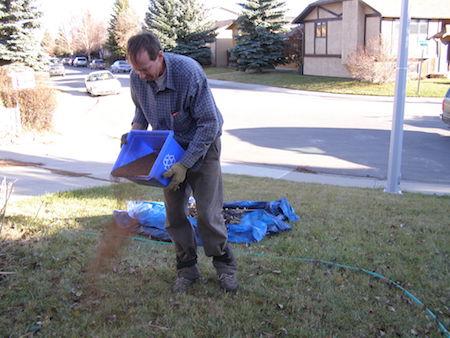
Step 4 The First Layers
Your first layer is the dried molasses or perhaps humic acid or a thin skiff of compost. Here is my friend Kevin sprinkling the stuff on my lawn.
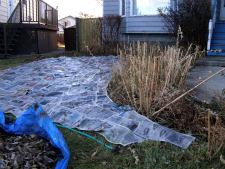
The next step is to cover the entire area with a layer of either wet cardboard or at least eight layers of wet newspaper. It’s important to overlap the cardboard or newspaper. Any gaps in the cover here will turn up as a strip of lawn or weeds in your new garden bed.
The beauty of using paper or cardboard as your sheet is that it will effectively block light from that weed or lawn area therefore getting rid of it. Once it's done that job it will rot down and become part of the soil.
Overlapping Layers of Newspaper or Cardboard
Step 5 More Layers
Next step
in the process is adding those layers of leaves and garden debris and
anything else you can throw at it. Include coffee grounds, kitchen
scraps, grass clippings, and all the material you collect in the fall clean up of the garden.
I mowed my back lawn with the bag attached. This way I picked up a good percentage of the leaves from my willow trees. They were not only nicely shredded in the process but were also mixed with grass clippings.
Herbicide Alert
Take care when picking up material from neighbors and farmers. If your neighbor has a perfect lawn with no weeds don't use their grass clippings. There is a chance they'll be contaminated with one of the persistent herbicides.
That goes for hay and straw. An alfalfa or alfalfa mix hay is safe to use. Other types including straw check to see what herbicides have been used. For more info check our herbicide page.
I also snagged bags of leaves from various neighbours who were about to send them off to the leaf depot. It would have been better if I had been able to shred these leaves. Leaves that are not shredded have a tendency to mat and can create problems in the mix. Everything worked out anyways.
I have since acquired an electric leaf shredder that I love. Last fall my friend Peter and I put the shredder together and then proceeded to shred 15 bags of leaves - in about 30 minutes. This is worth buying in my opinion, but it is so efficient why not go in with a group of neighbors and share it.
Pile all this stuff up. You can go as deep as 18 inches, or about 50 cm. I just didn’t have enough material to go that deep. My sheet compost was about 8 inches deep.
Oh... water everything. It is very important that all the materials are moist.
Step 6 The Icing on the Cake
Or is it the cheese on the lasagna - lasagna garden that is. There is a good chance that once you've piled up all your materials it won't be beautiful. To keep the neighbors happy and to tidy things up top your sheet compost with a thin layer of soil, compost or perhaps straw. This holds things in place till you're ready to plant.
Step 7 Wait...
Wait... and see....
If you start your sheet compost in the fall it should be ready to plant by spring.
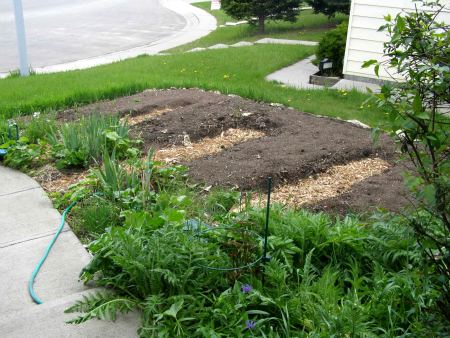
Here
is my garden in the spring before planting. I had done a bigger area
and so organized it into garden beds. I raked up the stuff off the
pathways on top of the growing beds and put down a nice layer of wood
chips for the paths.
When you plant your garden you’ll likely
find the paper hasn’t yet completely decomposed. This is okay but you
want to plant your seeds and transplants into the soil.
I don’t
have pictures of this sorry. Dig down through the now rotted compost to
the newspaper. For transplants chop a hole into the paper and dig into
the soil. Pop your transplant into the soil.
For seeds do the
same. Pull the composted material away from the newspaper, cut the
newspaper and plant into the soil. The compost will act a a nice nutritious mulch over the next season or two.
Are You Impatient?
Some people make
their sheet compost and plant into it right away. If you are going to do
this use be sure to plant into the soil rather than into the
decomposing material of the sheet compost.
Here is my garden in the fall. A lush beautiful, bountiful jungle.
A family from Scotland tried this method to start a garden in their yard. Check out their sheet mulching story - Gobsmacked in Scotland here.